Kombucha

I have recently had several request for my kombucha recipe. Kombucha is a probiotic that has many health benefits. It became my healthy way to replace soda pop in my diet. I like fizz and I like it sweet. After going to the store several times a week and paying for the store bought kombucha, I knew that I needed to learn to make my own. I would like to say that I started making kombucha and all was well. However, that was not the case. I made several batches that just didn’t taste like what I was able to buy at the store. Mine lacked fizz and at times it simply tasted like spoiled fruit. Over the last couple of years and sporadic searches on the internet, I think I finally have a recipe and a method of making komucha that is pleasing and contains the fizz and sweetness that I like. 
To make your kombucha, you will need

1 gallon jar

cotton dish towel

rubber band to fit around the opening of the gallon jar

1 bottle of your favorite unflavored kombucha

several bottles for the second fermentation

your favorite organic juice.

6 tea bags (black or green tea do best)

1 cup sugar


To start you Scoby (sometimes the scoby is called the mother)

  1. Purchase a bottle of your favorite kombucha. Make sure that it contains live culture and that it is unflavored.
  2. Wash and dry your gallon jar
  3. Pour the purchased Kombucha into the gallon jar
  4. Lay a clean cotton dishtowel over the opening and secure in place with a rubber-band.
  5. Place the jar in a dark place where it will not be disturbed. (I place mine in a lower cupboard that I don’t use often)
  6. Wait 14 days.
  7. The jar should now have a scoby ( a white film that may or may not be thick. Over time this will get very thick. )

Beginning your first fermentation:

  1. Take your new scoby and the kombucha liquid from the gallon jar. (make sure that your hands and the container that you use is clean and dry)
  2. Cover with a clean cotton dishtowel.
  3. Wash and dry the gallon jar and place 1 cup sugar in the bottom of the jar.
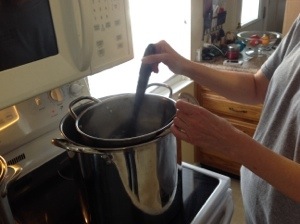
  4. In a medium sauce pan place 2 cups filtered water and 6 tea bags.
  5. Heat the water and tea bags until it strikes a boil and remove from the heat.
  6. Allow the tea bags to steep for 5 minutes
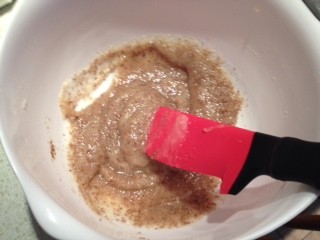
  7. Remove the tea bags from the liquid and pour the tea into the gallon jar with the sugar.
  8. Stir until the sugar is completely dissolved.
  9. Fill the jar with filtered water, leaving approximately 1.5 cup room at the top of the jar.
  10. Cover with a cotton dishtowel for approximately 5 hours or until the liquid reaches room temperature.
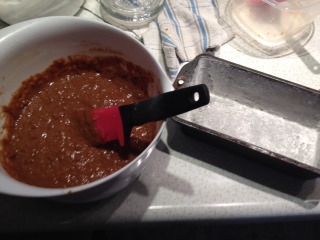
  11. When the tea has reached room temperature, add the scoby and the kombucha to the tea jar. (The scoby will float to the top. You can gently stir the tea to mix.)
  12. Cover with a clean cotton dishtowel and secure in place with a rubber band.
  13. Place in a dark place for 7 days. (It is important to not disturb the tea during fermentation)

Second Fermentation:

  1. Remove the scoby ,that should have thickened, and 1 cup of the new kombucha. (The scoby may have some areas of yeast growth. (brown tendrils or globs on the scoby) This is okay and will not hurt you. However, if you see mold of any kind, throw out the entire batch and begin again. Sometimes the scoby can be saved by separating the layer that contains the mold and throwing that part away. There are several pictures of mold on scobies on the internet. If you have any questions, look at these. My personal rule of thumb is if it is fuzzy I throw it away. This has only happened to me on one occasion over the past two years.)
  2. The scoby and the 1 cup of your new kombucha tea is your new starter. Place this to the side.
  3. Prepare all of your bottles that you will use for your second fermentation by washing and rinsing well. (I use the dishwasher on a heat dry.) I also save and reuse kombucha bottles from purchased kombucha. I have a few of the bottles with stoppers pictured above.
  4. Pour organic juice of your choice to approximately 1/4 of whatever bottles you use.
  5. Fill the remainder of the bottles with your new kombucha tea. Leave about 1 inch head space and seal tightly
  6. Place all of your bottles in a dark place for an additional 7 days.
  7. Use your scoby and 1 cup of new kombucha tea to begin another batch for first fermentation.

Kombucha is Ready!

  1. At the end of the 7 days, place all of the bottles into your refrigerator. This will stop the fermentation process.

Serving Kombucha

  1. Key points to serving tasty kombucha is to strain the tea as you pour it over ice. These bottles will have started another small scoby. Some people do not mind this, but I tend to be a little squeamish about swallowing these.
  2. It will be very fizzy so pour slowly.


Enjoy


Simple Romance

After a long day I was surprised with homemade vegetable soup and homemade bread with a glass of Der Champion from Buck Creek Winery.

The vegetable soup has been a work in progress and is now perfection.

Vegetable Soup

by Alan Jung

@alan_jung

2 medium onions chopped

3 ribs of celery finely chopped

saute these in a tablespoon of olive oil

add

3 minced cloves of garlic

28 oz can of diced tomatoes

14 oz can cut green beans

14 oz can of wax beans

14 oz can carrots

14 oz can diced potatoes

14 oz can corn

15 oz can tomato sauce

14 oz can black beans that have been drained and rinsed

salt, pepper and cayenne pepper to taste.

simmer for 39 minutes before serving.


The bread recipe is at

bakedbyrachel.com/garlic-and-herb-pull-apart-bread/

This is melt in your mouth.


And of course, candlelight! A perfect evening.


Granola

20140202-174945.jpg

When you have a Hippy Weekend, you must make some really good granola. This recipe made our Sunday morning healthy and tasty.

3 cups organic oats

1/3 cup wheat germ

2 teaspoons cinnamon

1 teaspoon salt

1/8 cup brown sugar

1/4 cup canola oil

1/2 cup honey

1/4 cup molasses

1 teaspoon vanilla

2/3 cup organic raisins

1. preheat the oven to 325 and line a baking sheet with parchment

2. combine the oats, wheat germ, cinnamon, salt, and brown sugar in a medium bowl.

3. in a separate bowl, combine the honey, molasses, oil and vanilla. Pour over the oat mixture and stir until the oats are thoroughly coated.

4. spread the mixture on the baking sheet and bake for 10 minutes.

5. remove the pan from the oven and stir the granola.

6. add the raisins

7. cool and store in an airtight container.

On this morning, we combined ours with some of our homemade yogurt and fresh strawberries.

(We thought that we might add some flax meal and substitute the molasses with sorghum. We may also decide to use other dried fruits)
20140202-174954.jpgAnother Hippy Weekend Success!!!!!

Homemade Yogurt

20140202-174442.jpgTo make your yogurt you will need

1/2 gallon (room temperature) organic milk

3 or 4 tablespoons (room temperature) plain organic yogurt that has a live culture. (We used Stoneyfield)

a thermometer that has a clip and will register 185 degrees

an 8 or 10 quart pan and a

4 or 5 quart pan with a lid that will fit inside the 8 or 10 quart pan

metal or plastic spoon

heating pad with a medium setting.

1. Sterilize the pans, spoons, and thermometer with a dishwasher or by boiling water.

2. place the milk in the smaller pan

3. fill the larger pan with enough water so that when the pan with the milk is set inside, the water is to about the same level as the milk.

20140202-174455.jpg4. When the water is boiling, set the pan with the milk inside and bring the milk to 185 degrees. 5. Maintain the 185 degrees for 30 minutes. Stir frequently.

6. Fill a sink with enough cold water so that when the pan of milk is immersed, it will be at about the same level as the milk inside the pan.

7. Cool the milk to 110 degrees.

8. Remove the pan of milk from the sink of water and add the 4 tablespoons of room temperature yogurt.

9. Stir to fully mix the yogurt into the milk and cover with a lid.

10. On a cutting board, lay a heating pad on a medium setting.

11. Set the pan of yogurt and milk on the heating pad and cover with a bath towel.

12. Let the milk and yogurt work for seven hours. (Do not disturb the pot)

13. After the seven hours, thoroughly mix the milk curds until the mixture is creamy.

14. Place in air tight containers and chill in the coldest part of your refrigerator.

Sweeten the yogurt with fresh fruit.

Another Hippy Weekend Success!!!!

Pickled Squash

20140202-174617.jpg

20140202-174630.jpgOne of our family favorites has become the pickled squash recipe. We have run low on our reserve stock so what better time to replenish the stock than on Hippy Weekend!

You will need:

6 to 8 yellow summer squash

6 or 7 onions

1/3 cup of canning or kosher salt.

* Cut the squash and onions into 1/8 inch slices

* Layer these in a large bowl with the salt.

* Put a layer of ice on the top and cover with a towel

* Allow these to stand for about 1 1/2 hours.

* Drain and rinse the squash and onions.

20140202-174658.jpg

Combine in a saucepan:

3 cups distilled vinegar

2 cups sugar

2 tablespoons mustard seed

2 teaspoons turmeric

2 teaspoons celery seed

1 teaspoon ground ginger

1 teaspoon peppercorns.

Bring to a boil.

Add the squash and onions to the saucepan and return the mixture to a boil.

Pack hot into hot pint jars leaving 1/4 inch head space. Remove air bubbles. (we use a butter knife to move the contents around until the air bubbles are gone)

Clean the tops of the jars with a clean dry towel and seal with the lid and rings.

Process in a water bath for 10 minutes.

This made 7 pints!

Another Hippy Weekend Success!!!!!!!

20140202-173532.jpg

Fat Free Pumpkin Bread

I keep a half bushel basket on top of my refrigerator for my root vegetables and squash. Yesterday, I realized that I had not looked in the basket for a while. So, I brought it down and found a pie pumpkin. I had bought several of these pumpkins this fall and this pumpkin had not been used over the holidays. I decided to cook the pumpkin overnight using my crock pot.

You can wash a pumpkin, use a fork to puncture some holes in the skin, and place the entire pumpkin in the crock pot for about 6 hours. However, my pumpkin was just a little too big for my crock pot; so, I cut my pumpkin into several pieces and placed it into the pot and allowed it to cook overnight.

This morning, I opened the crock pot and found a perfectly cooked pumpkin. I scooped the pumpkin away from the skin and put it in my blender to make it into a puree.

Pumpkin Pulp

With the snow blowing outside, I decided to make some warm pumpkin bread.

I don’t know about any of you, but I have been trying to get my healthy diet back on track since the holiday. So, to make this bread fat free, I substituted flax meal and applesauce into a typical bread recipe.

Fat Free Pumpkin and Flax Bread

Mix together:

1/3 cup Apple Sauce

Sugar and applesauce

1 cup Sugar

Add 2 Tablespoons Flax Meal


Flax meal measured

1/3 cup Molasses

1/2 tsp each: nutmeg and cinnamon

1/2 teaspoon vanilla

Flax meal in bowl


Mix together:

1 2/3 cup flour

1 teaspoon soda

1/8 teaspoon baking powder

3/4 teaspoon salt

then add to the above mixture.

Finished batterPour the batter into a very lightly greased and floured pan.

Bake at 350 degrees for 45 minutes to an hour.    Yummy!!

Pumpkin Bread

Slick Dumplings

dough

Sussex Dumpling:

2 Cups All purpose flour

3/4 tsp salt

4 Tbsp shortening

7/8 cup very warm water

1. In a large bowl mix flour, salt and shortening with fingertips until all the lumps disappear. Mixture should look like very fine cornmeal.

2. Make a well in the center and add warm water gradually while stirring to make a soft dough ball.

3. Flour a clean surface and divide the dough into 3 portions. Take a portion and knead on floured surface for about 20 times.

4. Roll into a very then rectangle. Cut into 3 inch squares and drop one by one into your boiling broth. Cook uncovered about 15 minutes. Be sure to stir occasionally so dumplings do not stick together.

5. Remove with a big slotted spoon to a deep serving bowl. I also add about 3/4 cup of broth to the dish as it keeps them hot. Use a smaller slotted spoon to serve them.

(I have also rolled them out and dried them for a few days to make a dry dumpling to have on hand. I simply placed them on wax paper and when they were thoroughly dried, I placed them in bags and put them in the freezer.

Puffy Dumplings

My family made a puffy dumpling. I don’t remember anyone teaching me how to make a dumpling and I have seen family members make a homemade dumpling and I have seen some open a can of biscuits and simply pinch off a bit of the dough and drop it into the pot. Somewhere I learned that no matter how the dumpling was made, when it floats it means that it is done.

I went through a period of time when I used Bisquick to make the dough and then one day I simply used my pie dough with a little more salt added to make my dumplings. I prefer the pie dough dumpling to any that I have made.

Puffy Dumpling

1/2 cup vegetable oil

1/2 cup water

1 1/2 tsp salt

Flour (enough to make a firm dough)

1. Mix the water oil and salt until cloudy then slowly add the flour until a soft dough forms.

2. Pour the soft dough onto a floured surface and continue to knead in additional flour until the dough becomes firm. (a little tougher than play dough)

3. Pinch off dough about half the size of a ping-pong ball. Drop directly into the simmering liquid of your choice.

4. Do not stir. When all of the dough has come to the top of the pot, the dumplings are done.

(I have tried to use different oils and only the vegetable oil will produce the correct effect with this dough. I have used different flours and although the consistency is different they will hold up in the simmer process.)

Big Mom’s Fried Apples

I guess this week has been a little bit of a walk down memory lane. I think the holiday’s do that. My Grandmother, Big Mom, was such a wonderful cook. I think she must have expressed her love for her family by cooking the things that they loved to eat. I especially loved waking up in the mornings to the smell of breakfast cooking. The mixture of bacon, eggs, gravy and the sweetness of her fried apples. I always remember watching her bring the apples from the freezer and putting the frozen apples directly into the iron skillet; so, I do the same thing each time I make them.

I remember that she passed along some additional wisdom about cooking fried apples that you need to know first.

1. only turn the apples once or twice, otherwise you get applesauce.

2. The sugar will burn easily so watch them as you cook them on medium heat.

Fried Apples

1. Peel, core, and quarter approximately 8 to 10 apples. (I use Granny Smith. They hold their shape when they are cooked and they are tart enough to make a nice tart sweet flavor)

2. If you have time, freeze the apples.

3. Big mom used bacon grease to cook her apples. I use a little canola oil. I use just enough to cover the bottom of a skillet.

4. Heat the skillet slightly on medium heat for frozen apples, a lower heat for unfrozen apples. Add the apples to the skillet.

5. Sprinkle approximately 1/2 cup sugar over the apples in the skillet.

6. Cover the skillet with a lid and allow the apples to cook. When they have browned slightly, turn them once.

7. Uncover the apples the last few minutes before completely done to allow the liquid to cook dry but not burn. (Big Mom always dabbed pieces of her homemade butter on the top just before serving.)

Yummy!

Zucchini Cakes

20140107_164920 (1)Many years ago I lived on a farm and had a large garden. I learned so much about gardening during that time. I loved the full flavor of the vegetables that we grew right out our back door.  One year we had a bumper crop of zucchini. I fried, baked and grilled zucchini and I made zucchini bread and jam. To this day, my children talk about how tired they became of zucchini that year. I no longer live on that farm and I no longer have a garden but I do frequent the local farmers market. Well a few years ago, there  must have been another bumper crop.  Zucchini was abundant and cheap at the local farmers market. I couldn’t help myself. I bought more than I needed and so I soon found myself grating zucchini to be stored in the freezer for a later time. As I recently began sorting  the freezer I realized I still had the abundant supply of grated zucchini. I remembered that one of the favored recipes I had used with the grated zucchini had been similar to potato cakes. So, we had zucchini cakes. They actually tasted so much better than I remembered. Perhaps because I didn’t have to eat zucchini on a daily basis. 🙂

I thought I would share the recipe.

Zucchini Cakes

2 cups grated zucchini

1 egg or (1 tablespoon flax meal with 1/2 teaspoon water)

1 small green pepper, finely chopped

1 medium onion, finely chopped

Flour , enough to make a wet dough.

1. Put zucchini, egg/flax meal, green pepper, and onion in a bowl. mix well using a spoon.

2. Add flour as you continue to mix until the mixture becomes a wet dough that can be formed into a patty.

3. Use a cooking spray, I use canola oil spray, your pan and on medium heat cook the patty until golden brown on both sides and cooked in the middle.

Enjoy