Big Mom’s Corn Bread

20140202-174738.jpg
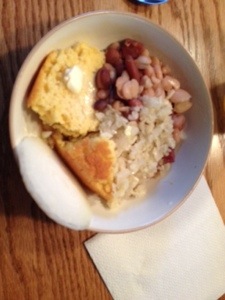
Soup Beans must have old fashioned southern cornbread. I taught my daughter-in-law the way that I was taught. Without measuring spoons or cups and by sight and feel. She did an awesome job. I had two big pieces.

1.Preheat the oven to 375 degrees

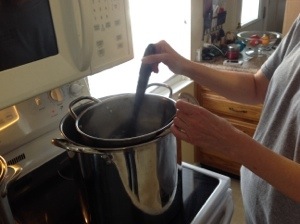
2. Put a rounded scoop of Crisco in an iron skillet, about the size of a rounded tablespoon. Place the skillet into the preheated oven.

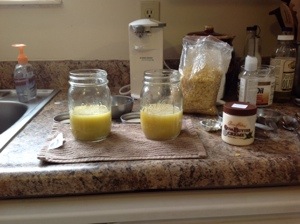
3. In a medium bowl pour a pile of corn meal and a pile of self rising flour of equal size.

4. Add 1 egg

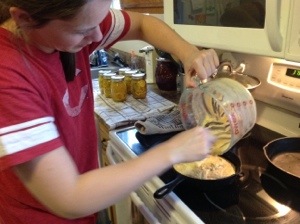
5. Add salt poured into a finger measure of approximately 1 teaspoon. (Sheila is demonstrating in the above picture)

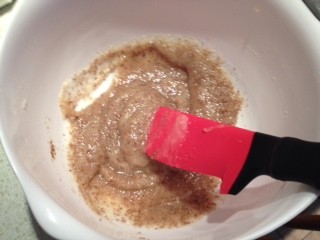
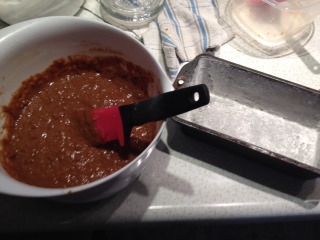
6. Add enough milk to make a batter that is similar to cake batter in consistency.

20140202-174753.jpg7. Pour the batter into the hot skillet with the hot oil. This should sizzle a bit when you pour it into the skillet.

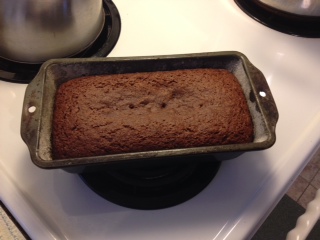
8. Place the skillet back into the oven and bake until golden brown and when a toothpick is stuck into the middle of the loaf and comes out clean.

9. Turn the bread out onto a plate. The bottom is the top on the plate.

Another Hippy Weekend Success!!!!!

Homemade Yogurt

20140202-174442.jpgTo make your yogurt you will need

1/2 gallon (room temperature) organic milk

3 or 4 tablespoons (room temperature) plain organic yogurt that has a live culture. (We used Stoneyfield)

a thermometer that has a clip and will register 185 degrees

an 8 or 10 quart pan and a

4 or 5 quart pan with a lid that will fit inside the 8 or 10 quart pan

metal or plastic spoon

heating pad with a medium setting.

1. Sterilize the pans, spoons, and thermometer with a dishwasher or by boiling water.

2. place the milk in the smaller pan

3. fill the larger pan with enough water so that when the pan with the milk is set inside, the water is to about the same level as the milk.

20140202-174455.jpg4. When the water is boiling, set the pan with the milk inside and bring the milk to 185 degrees. 5. Maintain the 185 degrees for 30 minutes. Stir frequently.

6. Fill a sink with enough cold water so that when the pan of milk is immersed, it will be at about the same level as the milk inside the pan.

7. Cool the milk to 110 degrees.

8. Remove the pan of milk from the sink of water and add the 4 tablespoons of room temperature yogurt.

9. Stir to fully mix the yogurt into the milk and cover with a lid.

10. On a cutting board, lay a heating pad on a medium setting.

11. Set the pan of yogurt and milk on the heating pad and cover with a bath towel.

12. Let the milk and yogurt work for seven hours. (Do not disturb the pot)

13. After the seven hours, thoroughly mix the milk curds until the mixture is creamy.

14. Place in air tight containers and chill in the coldest part of your refrigerator.

Sweeten the yogurt with fresh fruit.

Another Hippy Weekend Success!!!!

Non-Toxic Deodorant

20140202-174349.jpgOur next Hippy Weekend project was to make some non-toxic deodorant. This recipe is again, largely from the mymerrymessylife.com blog with some modifications. I would encourage our readers to please check out the mymerrymessylife.com blog to see this recipe without the modifications that we have made.

Ingredients:

  • 2 tablespoons beeswax (pastilles)
  • ¾ cup arrowroot powder
  • ¼ cup baking soda
  • 1/2 cup coconut oil

1. Combine all the ingredients in a pan.

2. Melt and stir the ingredients on medium heat until fully combined. (You could add an essential oil after the ingredients have melted. We chose to not add a scent.)

3. Pour the contents of the pan into the plastic deodorant stick containers. (We purchased ours from amazon.com; however, you could recycle your used empty containers from commercial deodorants.)

4. Let the contents cool until firm.

This made 3 deodorant sticks.

Hippy Weekend Success!!!

Soup Beans

20140202-173719.jpgSoup Beans, Corn Bread and Sauerkraut Yum

Soup Beans accompanied many meals when I was growing up.

They have many variations, but on the Hippy Weekend we decided to make them the way I ate them most often. You can use whatever beans that you would like. We used a 7 bean mix.

1. Sort your beans for any rocks or other objects.

2. Rinse the beans and then put them in a pot.

3. Generously add water to the pot with a tablespoon of distilled vinegar and let them soak overnight.

4. Drain and rinse the beans in the morning.

5. Fill the pot with enough water to cover the beans by about 2 inches.

6. Add whatever meat you would like to flavor the pot. We used ham.

7. Add a can of tomatoes (optional)

8. Add approximately 2 teaspoons of salt and pepper to your liking.

9. Bring to a boil and then simmer for 4 to 5 hours or until the beans are tender.

We eat the beans over cornbread and usually with sauerkraut and fried potatoes.

20140202-173737.jpgAnother Hippy Weekend Success!!!!

Pickled Squash

20140202-174617.jpg

20140202-174630.jpgOne of our family favorites has become the pickled squash recipe. We have run low on our reserve stock so what better time to replenish the stock than on Hippy Weekend!

You will need:

6 to 8 yellow summer squash

6 or 7 onions

1/3 cup of canning or kosher salt.

* Cut the squash and onions into 1/8 inch slices

* Layer these in a large bowl with the salt.

* Put a layer of ice on the top and cover with a towel

* Allow these to stand for about 1 1/2 hours.

* Drain and rinse the squash and onions.

20140202-174658.jpg

Combine in a saucepan:

3 cups distilled vinegar

2 cups sugar

2 tablespoons mustard seed

2 teaspoons turmeric

2 teaspoons celery seed

1 teaspoon ground ginger

1 teaspoon peppercorns.

Bring to a boil.

Add the squash and onions to the saucepan and return the mixture to a boil.

Pack hot into hot pint jars leaving 1/4 inch head space. Remove air bubbles. (we use a butter knife to move the contents around until the air bubbles are gone)

Clean the tops of the jars with a clean dry towel and seal with the lid and rings.

Process in a water bath for 10 minutes.

This made 7 pints!

Another Hippy Weekend Success!!!!!!!

20140202-173532.jpg

Baby Lotion Recipe

20140202-060417.jpg
This recipe was taken from mymerrymessylife.com blog with a couple of modifications. We substituted arrowroot powder in place of the zinc oxide powder. As mentioned in a previous post, the zinc oxide powder may have some toxicity. We also melted all of the ingredients in the jars instead of in a double boiler. The author of mymerrymessylife suggested web sites to purchase the ingredients. We  have omitted them here.
Baby Lotion:
1 cup shea butter
1/2 cup coconut oil
1/2 cup almond oil
1 1/2 tablespoons beeswax
1 tablespoon arrow root powder
Optional: 1 tablespoon vegetable glycerin or pure aloe-vera (optional for added skin protection)
Optional – 10 drops of lavender or other essential oil of choice for fragrance

1. Place all of the ingredients into a glass jar or container.

2. Place the glass container into a pot that has simmering water. (Make sure that the level of the water is not higher than the level of the ingredients in the glass container. Also, make sure that the container will not allow the water to splash inside with the ingredients.) We used a pint jar.

3. When all the ingredients have melted together, remove from the boiling water pan.

4. Stir the ingredients to make sure it is completely mixed and allow the containers to cool and the lotion to set.

(This lotion is not pour-able, but more the consistency of a lotion bar.)

A tiny bit of this lotion will go a long way. It also will take some extra time to completely rub into the skin. It leaves your skin very silky. We like it!! A Hippy Weekend Success!!

Diaper Rash Cream Recipe

20140202-051218.jpg As every mom knows, diaper rash is one of the things that must be treated and you always worry about the toxicity of the ingredients used in some of the most popular commercial remedies.. This is the recipe we used during our Hippy Weekend.

1 cup organic, raw unrefined shea butter
1/2 cup organic, raw coconut oil
1 tbsp. pastilles (beeswax)
3 tbsp. arrow root powder
2 tbsp. vegetable glycerin

20140202-052037.jpg
1. Using a double boiler method, melt the shea butter, coconut oil and beeswax together. This takes less than five minutes.
2. Remove these from the double boiler and add the arrow root powder and glycerin.
3. Using a mixer, beat the mixture for 5 minutes.

20140202-052523.jpg
4. Pour the mixture into your containers and allow it to set. Ours took about 2 to 3 hours before it was completely set. This will be a stiff cream consistency.

20140202-052802.jpg
(We found that using a pint jar might be a way to store the cream. but it was not an efficient way to access the cream. The wide mouth 1/2 pint jar was much easier to use.)

This recipe is mostly taken from the blog, mymerrymessylife.com. However, we modified the recipe listed on this blog by substituting arrow root powder in place of the zinc oxide powder. After researching the zinc oxide ingredient, my daughter in law found that it has been thought to contain some toxicity.

Hippy Weekend

A few weekends ago my daughter in law shared that she had been looking at several web sites to find recipes for baby products. She was interested in using ingredients that she knew would not hurt her children. Of course this is right down my alley and somewhere inside of me, I was doing the happy dance. I immediately volunteered to help her begin this endeavor. As that conversation progressed, she informed me that I was turning her into a hippy. After that our plan to meet for a weekend of making natural products for the kids would be dubbed, our hippy weekend.
This past weekend, we finally were able to get together to make baby lotion, diaper rash cream and some deodorant for us. In addition we made yogurt that was organic and GMO free, granola and we canned pickled squash. I also taught her to make corn bread, the way Big Mom taught me, and we made soup beans with a can of homemade sauerkraut. Of course we did all of this with the grand-babies under foot. This old hippy sure does have a happy heart.

20140202-055622.jpg

20140202-055630.jpg

20140202-173123.jpg

Fat Free Pumpkin Bread

I keep a half bushel basket on top of my refrigerator for my root vegetables and squash. Yesterday, I realized that I had not looked in the basket for a while. So, I brought it down and found a pie pumpkin. I had bought several of these pumpkins this fall and this pumpkin had not been used over the holidays. I decided to cook the pumpkin overnight using my crock pot.

You can wash a pumpkin, use a fork to puncture some holes in the skin, and place the entire pumpkin in the crock pot for about 6 hours. However, my pumpkin was just a little too big for my crock pot; so, I cut my pumpkin into several pieces and placed it into the pot and allowed it to cook overnight.

This morning, I opened the crock pot and found a perfectly cooked pumpkin. I scooped the pumpkin away from the skin and put it in my blender to make it into a puree.

Pumpkin Pulp

With the snow blowing outside, I decided to make some warm pumpkin bread.

I don’t know about any of you, but I have been trying to get my healthy diet back on track since the holiday. So, to make this bread fat free, I substituted flax meal and applesauce into a typical bread recipe.

Fat Free Pumpkin and Flax Bread

Mix together:

1/3 cup Apple Sauce

Sugar and applesauce

1 cup Sugar

Add 2 Tablespoons Flax Meal


Flax meal measured

1/3 cup Molasses

1/2 tsp each: nutmeg and cinnamon

1/2 teaspoon vanilla

Flax meal in bowl


Mix together:

1 2/3 cup flour

1 teaspoon soda

1/8 teaspoon baking powder

3/4 teaspoon salt

then add to the above mixture.

Finished batterPour the batter into a very lightly greased and floured pan.

Bake at 350 degrees for 45 minutes to an hour.    Yummy!!

Pumpkin Bread

Slick Dumplings

dough

Sussex Dumpling:

2 Cups All purpose flour

3/4 tsp salt

4 Tbsp shortening

7/8 cup very warm water

1. In a large bowl mix flour, salt and shortening with fingertips until all the lumps disappear. Mixture should look like very fine cornmeal.

2. Make a well in the center and add warm water gradually while stirring to make a soft dough ball.

3. Flour a clean surface and divide the dough into 3 portions. Take a portion and knead on floured surface for about 20 times.

4. Roll into a very then rectangle. Cut into 3 inch squares and drop one by one into your boiling broth. Cook uncovered about 15 minutes. Be sure to stir occasionally so dumplings do not stick together.

5. Remove with a big slotted spoon to a deep serving bowl. I also add about 3/4 cup of broth to the dish as it keeps them hot. Use a smaller slotted spoon to serve them.

(I have also rolled them out and dried them for a few days to make a dry dumpling to have on hand. I simply placed them on wax paper and when they were thoroughly dried, I placed them in bags and put them in the freezer.